
How to Connect an iPad Keyboard Case?
author: Eliza
2026-04-08

How to Connect an iPad Keyboard Case: Step-by-Step Guide
If you’ve just got an iPad keyboard case—whether for work, study, or typing more comfortably—connecting it shouldn’t feel like a chore. Let’s be honest: tech setup can be frustrating, especially when you just want to start using your new accessory. This guide is simple, straightforward, and designed for anyone (even if you’re not “good with gadgets”) to connect their iPad keyboard case in minutes.
We’ll cover the two most common connection methods, troubleshoot simple issues, and share a tip for choosing a keyboard case that’s easy to connect (and built to last)—hint: it’s from Vorkycase.

First: Check Your iPad Keyboard Case Type
Most iPad keyboard cases connect in one of two ways—Bluetooth or Smart Connector. Knowing which one you have will save you time. Here’s how to tell the difference:
-
Bluetooth Keyboard Cases: The most common type. They’re wireless, work with any iPad model, and usually have a “pairing” button.
-
Smart Connector Cases: These have a small metal connector on the bottom (matches the Smart Connector on your iPad). They connect automatically when attached—no pairing needed.

Step 1: Connect a Bluetooth iPad Keyboard Case (Most Common)
This is the standard method for most keyboard cases, and it’s easier than you think. Follow these steps:
-
Turn on your keyboard case: Locate the power button (usually on the side or top) and hold it down for 2–3 seconds until the indicator light flashes (this means it’s in pairing mode).
-
Open your iPad’s settings: Go to Settings > Bluetooth and make sure Bluetooth is turned on (toggle the switch to green).
-
Pair the devices: Your keyboard case should appear in the list of “Available Devices” (look for the case name, e.g., “Vorkycase iPad Keyboard”). Tap it to connect.
-
Confirm connection: You’ll see a “Connected” message on your iPad, and the indicator light on the keyboard will stop flashing (or turn solid). That’s it—you’re ready to type!

Step 2: Connect a Smart Connector iPad Keyboard Case
If your case has a Smart Connector, this is even simpler—no Bluetooth pairing required:
-
Ensure your iPad is turned on.
-
Align the Smart Connector on the case with the Smart Connector on the bottom of your iPad (usually three small dots).
-
Press the case gently against the iPad— it will connect automatically. You’ll see a “Connected” notification, and the keyboard will power on (no need to press a power button).

Quick Troubleshooting (Common Issues Fixed Easily)
If your keyboard isn’t connecting, don’t panic—these simple fixes usually work:
-
Bluetooth not working? Turn Bluetooth off and back on your iPad, and restart your keyboard case.
-
Smart Connector not connecting? Check that both the case and iPad’s connector are clean (wipe with a dry cloth) and aligned properly.
-
Battery dead? Charge your keyboard case—most have a USB-C port for charging. A dead battery is the most common issue!

Why Vorkycase iPad Keyboard Cases Stand Out
At Vorkycase, we design iPad keyboard cases that are not only easy to connect but also built for real-life use. With 15 years of manufacturing experience, our keyboard cases combine seamless connectivity (both Bluetooth and Smart Connector options) with durable materials and practical design.
Our cases feature responsive keys for comfortable typing, secure iPad fit, and long battery life—plus, they’re customizable (logos, materials, colors) for personal or business use. We also offer a range of tablet cases, phone cases, and accessories, all with strict quality control and on-time delivery.

Final Tip
Connecting your iPad keyboard case should be quick and stress-free. If you’re in the market for a reliable, easy-to-use keyboard case (or any tablet/phone accessory), Vorkycase has you covered—no complicated setup, just quality you can trust.


A Case for a Tablet
Tablet Case
Related Article

Many tablet users search for how to make a case for a tablet, hoping to get a custom, unique, and well-fitted protective solution. A homemade tablet case is perfect for casual use and DIY fun, while professionally made cases deliver durable protection for long-term daily use. In this guide, we share two practical ways to make a tablet case, simple enough for everyone to follow.
How to Make a Case for a Tablet

Tablets have become essential for work, study and entertainment. Even with tough glass and metal bodies, they remain vulnerable to bumps, scratches and accidental drops. A reliable tablet case is far more than a fashion accessory—it protects your device and upgrades your daily user experience.
A Tablet Case
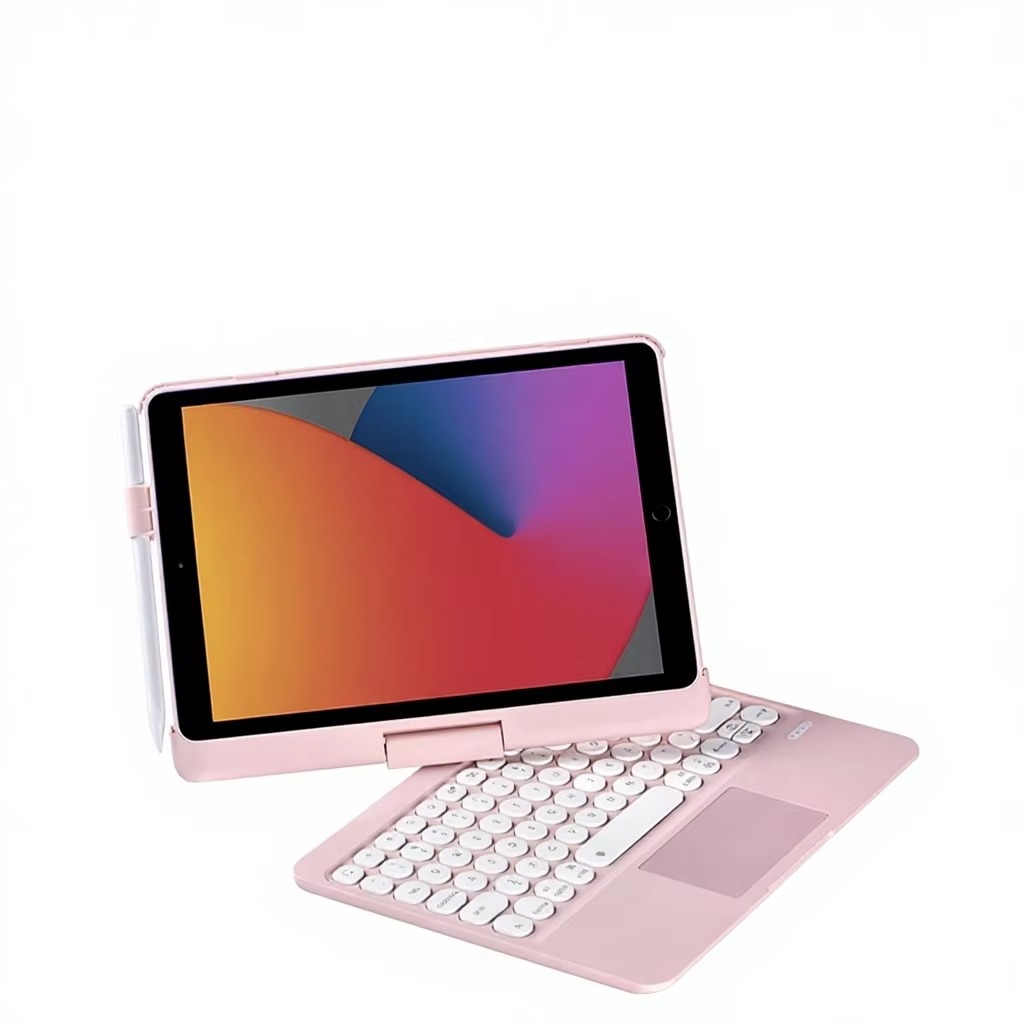
This ultra-slim 1.6cm thick tablet case comes with an integrated adjustable stand and built-in touchpad keyboard. The 180° free rotation structure lets you switch freely between typing and video viewing, turning your iPad into a lightweight laptop without extra bulk.
180° Adjustable Rotatable Touchpad Bluetooth Keyboard Case For iPad With Pencil Holder
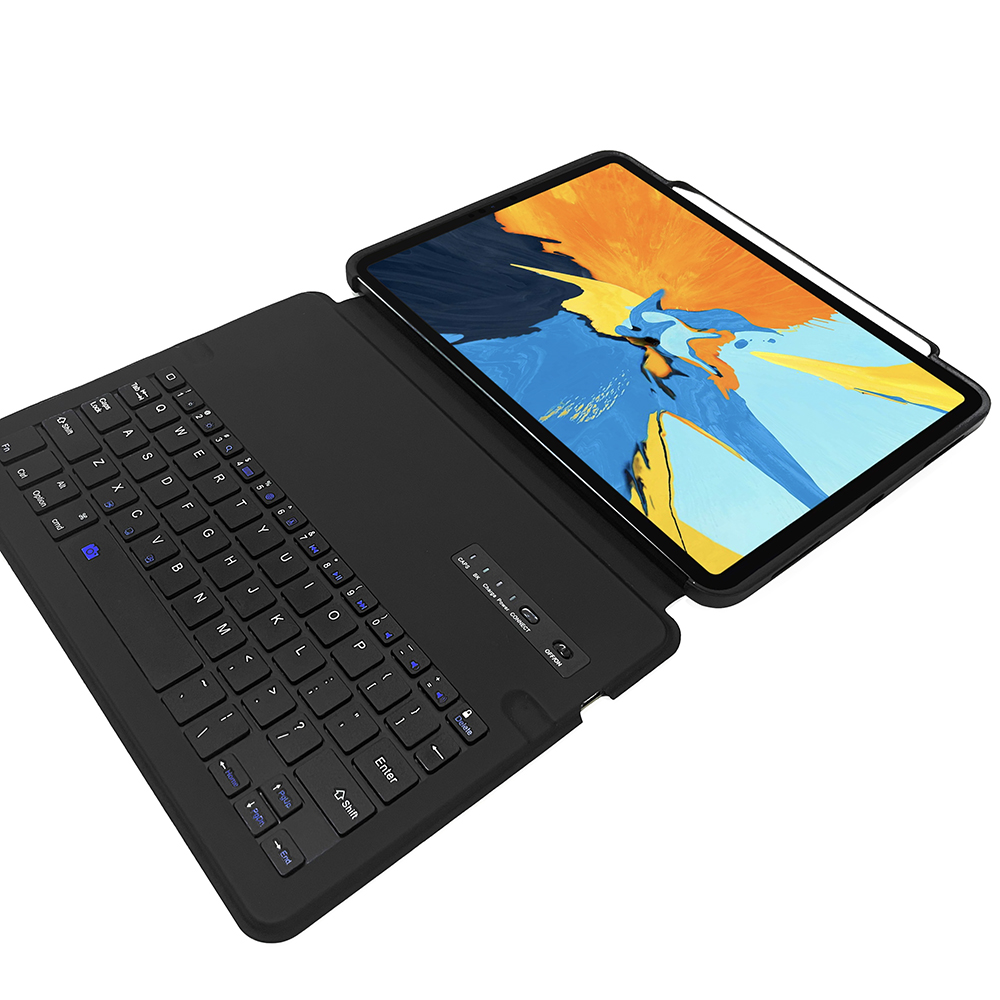
This integrated iPad protective case combines a detachable wireless Bluetooth keyboard, flexible foldable stand structure and independent stylus storage cavity. It converts the tablet into a portable notebook computer efficiently while offering comprehensive anti-drop and scratch protection for the whole iPad body.
Detachable Bluetooth Keyboard Folio Protective Case For iPad With Pencil Storage Slot